Hiển thị các bài đăng có nhãn Photography. Hiển thị tất cả bài đăng

Thứ Bảy, 6 tháng 6, 2015

Writing and Photography Services Available!

I am a writer and photographer for a magazine called 'Gippsland the Lifestyle', which covers the greater region of a vast area of Victoria called Gippsland, naturally!  My job entails writing feature articles and taking the photographs to accompanying them.  It's a fabulous job, one I enjoy very much and I am very proud to have.  As a writer there is nothing better than seeing your work in print, along with your name.  The above photo was one that featured in the recent Winter edition of the magazine along with an article on Bass Phillip Winery.  I dropped off a copy of the magazine to the owner and was so pleased that he was delighted with it, and that he said, and I quote (!), "it was the best article ever written on the winery".  This was a big statement, considering this winery produces WORLD renowned Pinot Noir and I was exceedingly flattered.  This comment made up for so much.
 
I am very pleased to announce that I am extending my writing and photography services to include copywriting, of which I have done a lot of already.  Work includes writing the content for websites and selling photographs for commercial purposes.  I also used to work for a company called Web Profits where I wrote articles for SEO purposes.  If you are interested in my services please do not hesitate to contact me at amber.freelance@gmail.com and we can discuss your needs.
 
An example of websites I have provided the copy for can be found here at Sheridon Dixon Makeup Artist and Flawless Hair and Makeup.  
►

Thứ Hai, 6 tháng 4, 2015

How to Use Shutter Speed to Get the Photos You Want


Cameras and photography can be quite confusing.  I mean there is a lot to think about all at once; adjusting your settings to suit the light, thinking about your depth of field, getting the shot in focus (der!), not to mention all the artistic things you need to worry about, like framing, the rule of thirds, backgrounds, composition, colour, scale, the use of props...... the list goes on. 
You can, of course, make it as confusing, or as simple as you like.  A simple 'point and shoot' camera will take care of a lot of this for you, at least the technical details, so all you need worry about is creating pretty pictures.  A smartphone will do a similar job.  But sometimes you want to have just a bit more control over your camera because there is a specific photo that you want to capture.  Whether it be for a blog post, for work or just to capture you kids soccer match, sometimes you want to be able to get the shot you want when you want it.  Shutter speed is one of those things, if you break it down, you can simplify it to cause yourself WAY less of a headache and still get the end result you were after.

The first thing is to not be scared of your DSLR camera.  While it is very easy to take photos with the automatic settings switched on, and there is no problem with that of course, try giving the other settings a go.  Have a play with it!  To change your shutter speed the setting you are looking for is the one marked 'TV'.  This is the shutter priority setting and the 'TV' stands for Time Value.  By using this you can control the shutter speed, but don't need to worry about anything else...your camera will choose the correct aperture to suit the brightness of the subject. 
Now, you can adjust your shutter speed by using the full manual settings on your camera, which is where you have to adjust everything, so the aperture and ISO as well, but to keep it simple, and to just concentrate on your shutter speed for the moment, lets just work with the 'TV' setting.
Now in the photo above the shutter speed was set to a faster time; therefore a higher number.  The higher the number the faster the shutter opens and closes, therefore you are able to freeze the action.  This is seen with the horse above that I photographed at the local harness racing.  As the shutter was set to a very high speed the horse has been captured in this photo in such a way that he has all feet off the ground and he effectively looks like he is frozen in mid-air.  When taking photos of sporting events particularly, people want to see the action, not a blur, so having a faster shutter speed is highly desirable. 
This photo of my husband, clinging for dear life to his horse (this was the very first time he had ridden Sabre after buying him that morning....and the saddle was WAY too small....so forgive the slightly terrified expression....), is another good example of motion frozen in time.  What's great about the use of a faster shutter speed here is it really has captured the tension of the moment.  My husband is a very good rider, but here he actually was a bit apprehensive and unsure because this was the first time he had ridden this particular horse.
Often when you read anything about shutter speed it is illustrated by the use of waterfall photos.  I'm sure you know what I mean.  If you don't I will explain.  There will be two photos; one with a photo of a waterfall with the water perfectly frozen, so you can see the water drops clearly, then the other shot will show one where all the water is just one big blur.  The first is taken using a fast shutter speed, the second a slow shutter speed.  Simple.  By slowing down the speed of your shutter, therefore having it set to a lower number, you are leaving the shutter open longer when you click it.....so.....whatever moving object you are taking a photo of will appear blurred.  But wait...Why would you want something in your photo to be blurry?  Surely we want to have nice, in focus photos.  Not necessarily, and not always.  Having blurred objects in our photos, and by this I mean a moving objects (not just a whoopsie and something that is accidently out of focus...!), will give the feeling of movement within you photo.  I could have showed you a typical waterfall shot...but instead I have chosen another farmy type photo and used this shot (above) of the rouseabout throwing the fleece in the shearing shed.  You do see fantastic shots of wool being thrown, and they are perfectly frozen in the air, the shot taken with a fast shutter speed, but I quite like this photo.  The fleece really is moving in this shot.  To me the photo has life, it has movement and I was happy with it.
Another shearing shot, and this is my husband featuring again (minus the horse but plus a hand piece), but it is also another shot where the shutter speed has been set at a slower speed.  Why you might ask?  Why, when I'm taking photos of people moving at a fairly fast rate?  Shouldn't I have set it to a faster speed so that he was frozen, the perfect action shot?  If you look closely you can see that his hand and arms are blurred, which does give this photo the feeling of movement.  In this case, it wasn't actually planned.  This photo was taken using a tripod and the shutter speed was lowered due to the fact that it was fairly gloomy in this shed.  I didn't want to use a flash, preferring to use what little natural light there was, and as a result I have the blur.  This wasn't a bad thing, in fact this photo was used in the magazine article I took these photos for...and this photo took up a whole page on its own.  (Note: this photo was taken using my old camera which is no where near as light sensitive as my new one...which would have handled this low-light situation a lot better.  Also the tripod was necessary to avoid camera shake with the lower shutter speed.)
As discovered above, lowering the speed that our shutter goes off isn't always because of the motion going on in front of us.  Sometimes there is not enough light on our subject and a way to capture the photo is to let in more light by opening up the shutter of the camera for a longer period of time.  Here I am reading a book.  Well actually I'm staring wistfully out the window.  It wasn't overly dark inside but the camera was having to adjust to the light coming in through the window and me being in shadow, so setting up my camera on a tripod and slowing down the shutter speed was a great way to get the photo I wanted without resorting to using a flash.  Personally I dislike flash photography and will go to great lengths to avoid it.  For a shot like this you MUST use a tripod, or rest your camera on something flat and secure.
These are just some simple points, like all things to do with photography you can go into much more depth on the subject, but I hope these have been helpful.  


►

Thứ Hai, 30 tháng 3, 2015

How to Take Better Landscape Photos

This week I am away 'up north'.  When I say 'up north' this is where I mean when my husband goes away shearing.  My in-laws have a farm near where we live and they also have one up here in New South Wales, at a place called Wakool, which is about 30 minutes or so west of Deniliquin.  It is a very different landscape to where we live.  There is also a lot of wide open spaces so I thought I would have a look at landscape photography for today's Tips Tuesday.
There is one thing with landscape photography that I always find disappointing.  The photo never seems to do the scenery justice.  What I mean is, you go on holiday somewhere, see this fabulous view, thing "Quick I must take a photo so I can show the folks back home," and yet the photograph never seems to truly capture the splendid scene that you saw spread out before you.  It never seems to give you a true sense of scale, or capture the glowing afternoon light, or leave you that giddy feeling that the view from the cliff did.
For me, who doesn't take brilliant landscape photos, (I actually don't own a wide angled lens) I find mine a little...well...boring.  So, I've come up with a few tricks.  In the photo above I have included a sheep and a water tower in the foreground.  It has broken up the photo so that you look through to the tree and created some interest in what would have otherwise been a fairly flat uninteresting shot.
The use of leading lines can help you look into your photo.  These tyre tracks leading off into the distance give you something to focus on in this shot...instead of just a rather uninteresting row of trees at the bottom of the paddock.  (This track is actually leading to the tip...but shhh...don't tell anyone)
This big gum tree on the edge of the photo gives it a nice frame.  It also gives the photo a good sense of scale.  I have shot this looking in towards the rising sun, which also looks a lot nicer with it peeking through the trees, instead of blowing up in my face and causing a lot of glare. 
Mix up your landscape photos by making good use of different levels of light.  This sunset had an unusual red sun, which is further highlighted by the silhouette of the buildings and tree in the foreground.
I find shots of the sea really really boring.  All that blue expanse... it does nothing for me.  It's a personal thing of course, because I would rather look at the countryside, but I always feel the water is better broken up with a bit of coastline showing, and even having a person in the foreground.  Once again, you get a better sense of scale with my son in this shot.  You also get the feeling that this water is cold!
This is more my style of landscape shot...I mean at least it's the countryside, and the hills give you something to look towards, but having the shed in the middle ground gives you a good balance within the photo.  It gives you an idea of the space of the great outdoors, with the shed being off in the distance, and as it is dwarfed by the hills in the background, it gives it a further feeling of isolation.  Again it's thinking about that sense of scale, so think about what can be in the shot that will give the viewer an idea of how grand and fabulous everything is.
This dry and barren landscape is not particularly interesting.  It has wonderful rustic character but without the girl in the foreground, frankly it would be a really boring photo.  The colours of the landscape aren't that rich or exciting either...but give the girl some bright pink balloons and BANG!  (no...don't pop the balloons!)...the photo is given some life, but also the contrast of the plain background suddenly looks great against the bright colours.  Remember, your background, middle ground and foreground are all a part of a whole.  Don't forget to look at everything in your shot and tie them all together.
Great landscape photos are everywhere you look, it just takes a bit of getting used to seeing them and perhaps shifting your focus to take in the whole view.  The paddock above is lovely, but I think the clouds really make this shot.  Who would have thunk it!?!


►

Thứ Hai, 9 tháng 3, 2015

How to Take Photographs of Animals

Today's Tips Tuesday is about taking photographs of those other important loved ones in your lives; your pets, as well as other animals you may deem particularly photo worthy.
Taking photos of animals requires an extraordinary amount of patience and time.  You can ask a dog to 'sit', but that doesn't necessarily mean he is going to look at the camera, if that's what you want him to do.  Cats can either be difficult or easy, depending whether they are in their 16 hour sleep cycle or enjoying that fifteen minutes of terrorising the dog.
The trick is to have your camera either permanently attached to your face, or in an easily accessible place.  I leave mine on the kitchen bench all the time, so if a photographic opportunity presents itself it's within grabbing reach.
Taking photos of animals when they are just hanging out doing their own thing is often best.  You really get a true sense of their personality and capture them in a 'moment'.  I used my zoom lens to get this photo of the cat.  Having a shallower depth of field works well too.
I really like this shot of these horses.  Try and think outside the square a little.  This isn't your usual 'person on horse' type of photo, nor is it a standard sort of horse shot.  These two were snuggling up together and it made for a different photo.  I also cropped a lot out of this shot, their legs for example, which I think makes it work better.  Think about what is within your frame.  Sometimes closer is better.
It is, of course, great to get people in with your animal shots.  Casual, un-posed shots work well.
Animals can create some awesome action shots!
And it is great to sneak up on them having a quiet moment.  Remember that the same rules of photography apply, for example, taking photos of people during that 'golden hour' in the late afternoon will give you the best light.  This old dog is highlighted beautifully in the early evening glow.
Zoom up on your subject.  You will capture all those fine little details, like the feathers on this chook.
As well as the lighting think about what is in the background.  These sheep were wedged in this pen waiting to be shorn.  The old door in the background gives this photo a lovely rustic feel, and the light behind it really makes this photo.  (so much so that I actually won 1st prize with this photo on the weekend!...very pleased!!)
Don't just stalk your pets!  Get some shots while you're out and about.  Cows make fantastic subjects!  They're so mooo-ving.  (sorry, couldn't help myself)
And don't be afraid to get dirty!  Get down and in amongst it.  You'll get some fantastic shots if you get down on an animal's eye level.


►

Thứ Hai, 2 tháng 3, 2015

How to Take Great Photos of Your Family

There are some of us who are lucky enough to take photos for a living.  For the last year I have been one of these lucky people.  I still have to pinch myself actually.  But for many more of us we have no desire to turn our photos into something that is hopefully going to pay the bills, but rather cameras are used to record precious moments of our families.  Now, I actually start to think of these people as the lucky ones...those who have time to pull out their cameras for these special times, rather than having to pull it out ALL the time and try and get the perfect shot for work.  Strangely, despite being a photographer, I have no photos of my children on the walls!

Anyway, today for my Tips Tuesday I thought I would focus on taking photos of your loved ones, and how to make them a little better.  It doesn't take great technical skill, just a little forethought, and a considerable amount of stalking!
This is my son Jesse.  I actually had planned to get photos of my children on this particular day...as you might notice he has a clean face, for a change, and his hair has been 'styled'.  As well as trying to tidy your children up (!) think about what is in the background.  To really make my son stand out in his stripy shirt I have caught him in front of a background that is not plain, but being all the one colour, he stands out.  Paying attention to what is behind the subject can really help make for a better photo.  He's not smiling here but that doesn't matter.  I really like this shot.
A similar background here for my other son Austen, except this time I have snapped him at a different angle.  I didn't ask him to pose, he was busy cloud watching and rolling down a little hill in the playground, so probably another lucky photo on my part, but it really works.  Remember, you don't always have to get 'straight on, standing up and smiling' photos of your kids!
I love this one of my boys together.  I didn't set this up either.  Patience is key when you are taking photos of children.  Wait.  Watch.  You will be rewarded.
This is my husband.  He HATES having his photo taken.  I, on the other hand, like taking photos of him, so will get a sneaky shot in here and there because one day when we are old and grey I want to have something to look back on.  Of course...we all do.  I find with camera shy people it is great to get a sneaky shot when they are doing something they either enjoy, (ok...so my husband doesn't actually enjoy shearing!)...or doing something that typifies who they are.  My husband is a shearer, it's actually not a hugely common profession any more, I'm proud of him and THIS is him.  Shearing is part of who he is.  So take some shots of your partner doing their everyday thing.  Not only are they great to look back on but you will catch them being themselves in their everyday environment.
I actually just had this photo printed today, something that is really rare for me to do I'm afraid to say.  I need to do it more.  Anyway, I've left it with my Dad to frame (he's so conveniently a picture framer!)  I adore this shot.  It was one of the photos from one of my outfit posts and this is my little girl.  She was just running about doing her own thing and I love the movement in it.  It's just one of those perfect natural shots.  To me this is what photography of people is all about.  Particularly children.  Not posed shots.  There is life in this photo.  Try and capture the life.  Take your kids somewhere fun, like the park for example, and just start snapping away.
There is nothing wrong with taking photos without smiley faces in them.  You don't even have to have them facing the camera.  This is my eldest son Ethan with his little sister.  There is a 10 year age difference.  It's not a perfect shot in terms of pretty backgrounds or fancy perfect clothes, it was just one of those 'opportunity shots' but I love it.  It will be one to look back on when he is a grumpy teenager and she is his 'annoying younger sister'!
Kids sports are great places for photos.  They might not be pretty, they will probably be covered in mud and pulling funny faces of exertion, but they really put you in the moment.  Just make sure you have your camera shutter speed set to a higher speed.
As well as your shutter speed sometimes you need to adjust yourself.  Get down on the same level as your kids so your photos are not always angled down as you stand above them.  I would have not been able to see my son's face or expression of concentration if I had just shot this from above.  An all round better photo.
Another 'behind' photo, my son Jesse with his older cousins, which will be great to look back on when he is older because no doubt he will be the one towering over the girls!  Remember to quickly think about where the light is coming from.  I wasn't shooting directly into the sun here, but it really works because the elongated shadows give a great sense of not only the time of day, but seem to connect them all.  I don't know...it just works.  I managed to step to one side with this one and avoid shooting directly into the light, and avoid any sun glare.
 
Now, for that husband who doesn't like having his photo taken.....
Make sure you get a photo of him standing on his ute, holding a lizard while talking on the phone...
Have him sharing a moment....and his cup of tea....with his horse....
Make sure you get him on his horse....he'll like that...
....although you'd better make it an action shot....he'll like that even better!
 
And as for yourself.....well...if you're anything like me you seem to be strangely absent from EVERY family function because you're always the one behind the camera, but having a tripod and a remote is really handy.  Remember to get some shots of yourself (either a selfie or too!!) or hand your camera to someone else!
This is me, quite a while ago, with two kelpie pups.  This wasn't set up this shot, and my son took it.


My son also took this shot, but it was obviously posed.  If you miss out on having photos taken of yourself, because you're always the one behind the camera, then go out of your way to get in front of it.  Set up a shot like this (ok, maybe minus the cows), and pretend you're in a fashion shoot for a magazine....it's so much fun!!  And you can create something really magical!


►

Thứ Hai, 16 tháng 2, 2015

Food Photography for Articles & Advertisements

Keeping with my photography theme I thought I would make today's Tips Tuesday about taking food (or food product) photographs for magazine articles and advertisements.  This is something that I find myself doing quite often for my job as a lot of the businesses I do stories on are either primary producers (so do things like make cheese or wine or have cattle or pigs!)....and I have taken quite a lot of shots in cafes too.
 
Now true 'food photography' is a whole art form in itself.  Something that requires a 'food stylist' and hours of setting up and gluing together food and propping up hamburger buns with cardboard and doing other random things that I know nothing about.  That is definitely not what I do.  I basically get in, snap photos and get out again, trying not to get in anyone's way.  Well....sort of.  There are some basic things that I keep in mind and I thought I would share them with you today.
Make Your Photos 'Pop'
Sometimes when I'm looking through the viewfinder I know instantly that something is missing.  Whether the scene is too cluttered or an object needs to be turned slightly the other way, or even if it is lacking in a little colour.  For example, this camembert cheese that I photographed for an on-farm cheese company.  With a white table underneath this glass platter, and the white cheese, it needed this little sprig of lavender to give the picture a little lift.  I did have to ask (nicely) for the owner/cheese maker to go and pick me some lavender from her garden, but afterwards she saw immediately why it was a good idea.
Cropping
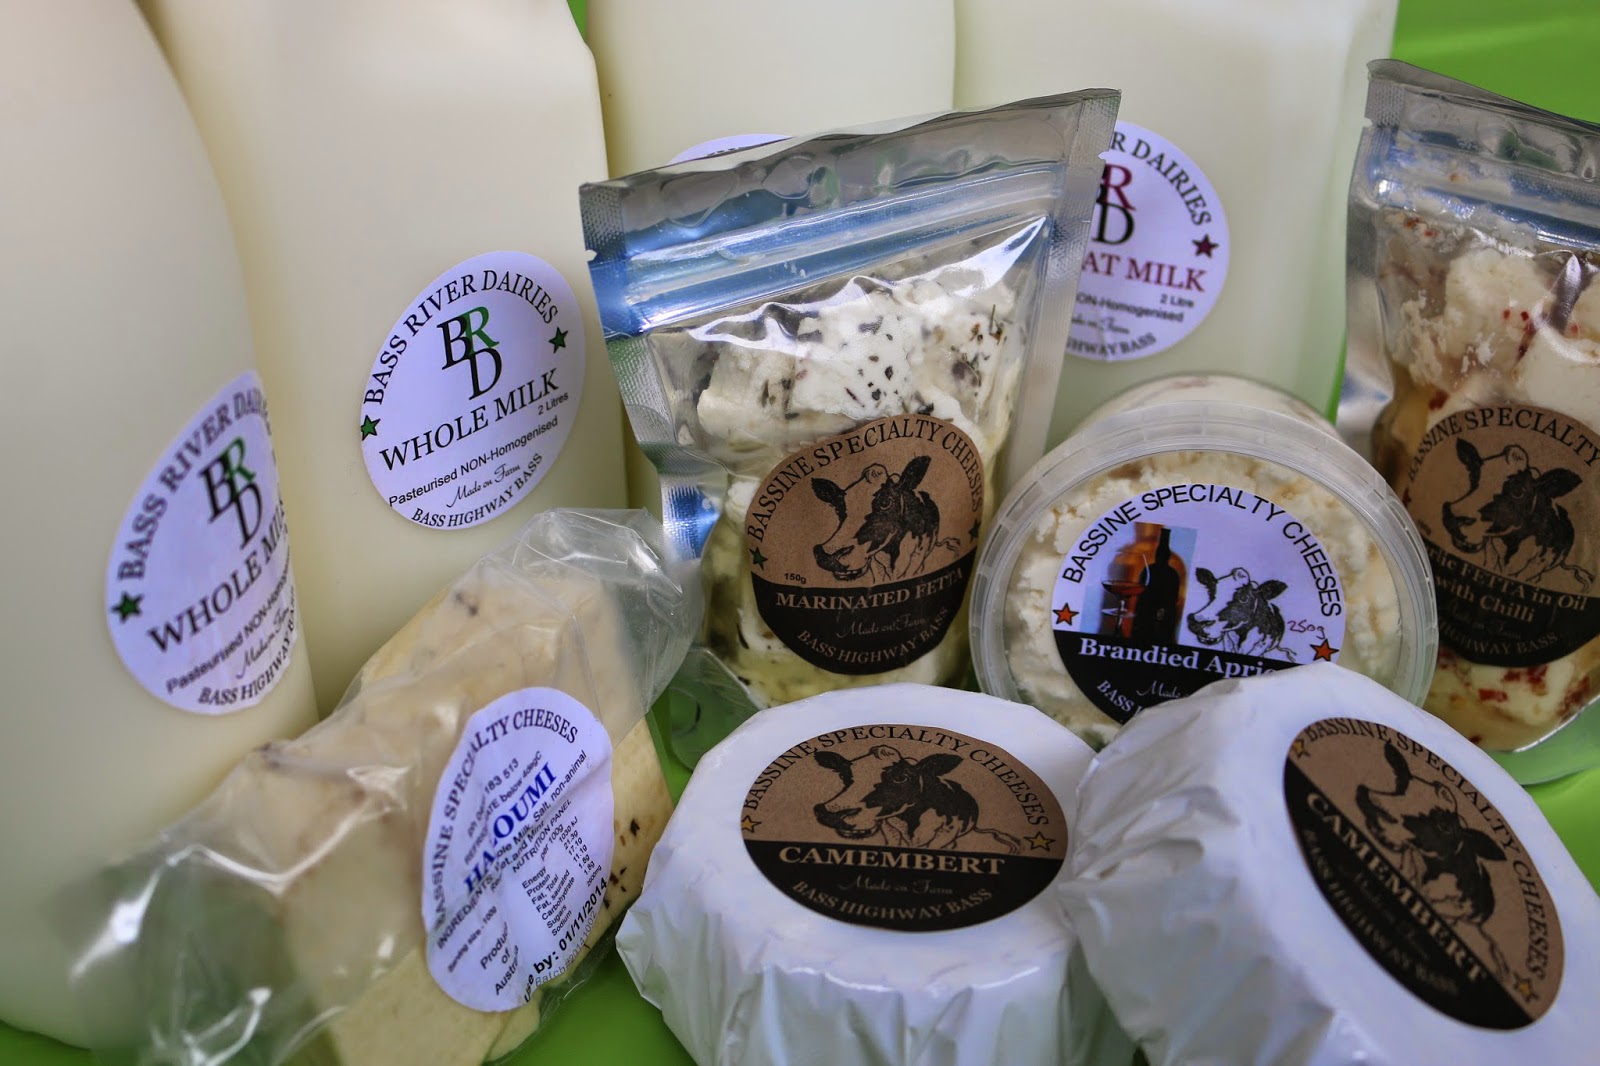
Sometimes photos are hard to set up, and once you do get it stacked just the way you want it, it still doesn't look exactly right.  This was the case with the photo above.  I just didn't like the green background at all.  Basically it was a plastic table cloth that just looked a little cheap, to be honest, and the colour stood out way too much against the white of the milk and cheese.  This was the opposite of my problem in the previous shot, where I needed that pop of colour.  Here I wanted to avoid it because the background was just not important.  This is where post-production can be your best friend.  By all means, crop away what needs to be cropped away!
Making the Uninteresting Interesting
Above is another cheese photo.  Here is another.
And another...
....ooooo...pretty pyramids.  I'm sure I have a few more cheesy shots....
Oops..and here we go again...
...what is it with me and cheese??!  Anyway, cheese is not a particularly exciting thing to photograph.  I mean it doesn't do anything, or say anything...not even "Cheese" when you take the photos ("ha!  get it?!..."cheese")  Sorry.  So, what I was trying to say is that cheese is all about texture, as well as taste, so this is what I've tried to go for when taking photos of what is otherwise a pretty boring photographic subject.  Look for ways to make it appear tasty, which of course you know it was!
I also do get to take photos of other types of food....I promise...
...such as this mushroom.
 
Up Close and Personal
How interesting can a mushroom possibly be?  Actually, when you look at it closely, very.  Look at the segments, the texture and the gorgeous shades of brown.  I loved taking these photos, even though at first I was dreading doing this shoot, because I just didn't see how I could make it interesting.  I mean, come on...they're mushrooms.  They grow in the dark.
But in the end they made themselves interesting!  I mean...how gorgeous are they!  They're almost cute...like little squidgy plump buttons of fungi fun!  They kind of remind me of that Disney movie 'Fantasia'. 
Really it was all about giving these little guys the benefit of the doubt and seeing them for more than what I thought they were going to be.  They turned out to be excellent subjects for photos......and then the owners of the business murdered these ones above....and cooked them up with pesto and goats cheese and I'm afraid I just had to eat them.  I felt terrible.  They were delicious.
Packaging
Sometimes food comes in packaging....and sometimes it comes pre-packaged...like these eggs...popped out conveniently by the chook, all in it's own little oval-shaped container.  How thoughtful of her.  But sometimes....the food product will also come in some OTHER form of packaging, like a box or a bag.  It's important to show that off well too.  Make sure that the colours are true to life, particularly if you have to go home and edit your photos, because these colours are carefully chosen by the business (or their marketing team), and represent their brand.  It also helps if you have the packaging in the shot looking neat and tidy, (so no folded dicky corners or crumpled wrappers if you can help it.)
I know...I know....more cheese...but it is also the pretty packaging that I wanted to highlight by using the background to set it off...the green of the labels with the little picture of the sheep.....(it was sheep milk cheese by the way).  Baaaaa.....
Harvest...Paddock to the Plate
Sometimes I have to take food shots before the food is really even food, or should I say, the end product, like these olives above.  Yes!  These are baby olives! Everybody.."one..two..three..Awww.."
So cute!
And here are some grapes.  These were probably teenagers, in terms of their age.  So not so cute.  But, my point here is that it was really important to show off the raw ingredient.  Really give people a feel of what it was like to stand up close and be able to touch, feel and smell the harvest.  This is why in these sorts of photos I like to switch my camera over to macro so I can pick up every little detail possible.
Food Photography
Now, this is probably what you were thinking of when you read my title of my post....'Food Photography'.  Now this is food!  A plated up pile of deliciousness all good to go and ready to be devoured.  This was a plate of barramundi.  I got to eat this by the way.  Jealous?  You should be!  For these type of food photos I can't afford the time to set up lighting boxes and lights and all the creative claptrap that goes along with 'real' food photographers, (although don't get me wrong...these people do AMAZING things), but as a magazine journalist you just can't afford the time...nor anyone else's for that matter.  While I was taking these shots I had the chef hanging over my shoulder...who was sort of in a hurry to get back to the kitchen as they were in the middle of serving lunch.
So this is where I do the best job I can, in the time I have, in the space I have, with the limited equipment that I have.  It's a kind of a "make do" situation.  For me I take photos of food using the most natural light I can, which means finding a surface/area/table that is flooded with as much light as possible, set up my tripod and switch my camera over to a slower shutter speed...because hey...unless I'm trying to photograph melting ice cream...my subject isn't going anywhere.  I also take a few varying the degree of the depth of field so I get parts of the food slightly blurry.  It just makes it look a little arty.  I make sure I take lots of shots so I have plenty to choose from.....and I be extra nice to the chef....so he/she lets me feast on it afterwards!  Probably the best tip I could give you!


►